picoCTF 2022 - Keygenme
Writeup for picoCTF 2022 'Keygenme' using Ghidra and GDB

Overview
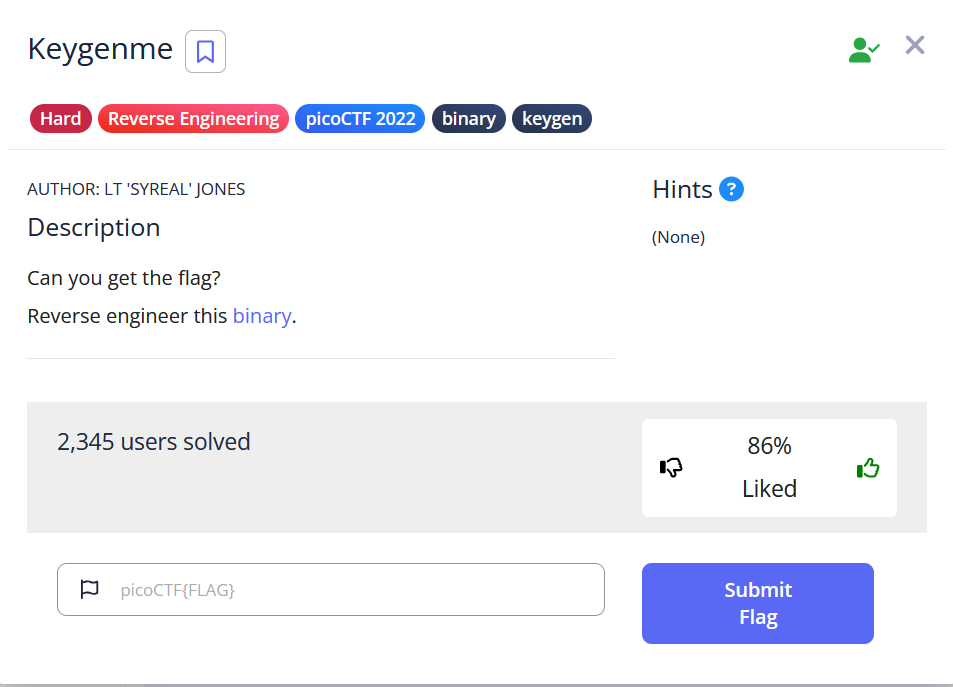
In this challenge from the picoCTF 2022 we receive a binary and a little hint from the Title of the Challenge “Keygenme”. The goal is to find the Flag which in this case is maybe a generated Key.
Through some Reverse Engineering the Binary in Ghidra and some debugging with GDB we are able to easily read out the Flag and submit it. The challenge is labeled Hard, but once the key-checking logic is understood, the solution is straightforward.
Challenge Description
Tools and Setup
For this Challenge I used:
- Ghidra to Reverse Engineer the binary
- GDB to debug the binary and read the flag
Analyze the Binary
First I tried looking at the binary via strings to get an initial overview of whats going on.
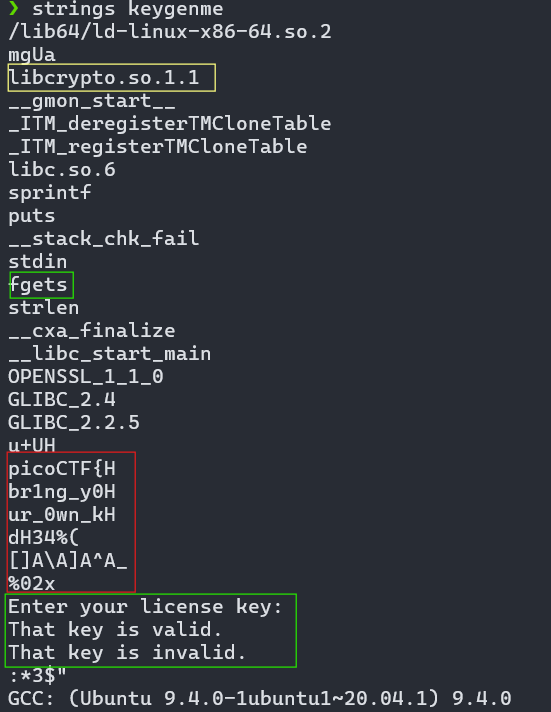
Here we can see some indicators of what might be going on. I marked my findings in the Screenshot above.
- Yellow: I thought that maybe something gets Encrypted/Hashed. But no Idea what.
- Green: There is some User Input. Which probably is the missing “Key”.
- Red: We can already see part of the Flag but there is still some part missing after the
picoCTF{br1ng_y0ur_0wn_k3y_but we only see some Garbage right now. - Green: As I thought before it seems like the Program wants some Input via the fgets Function from before and this gets somehow checked and then the response is either
That key is validorThat key is invalid.
Because we now know that the Program checks something I thought why not just debug it and see whats going on.
Another useful command is file <filename> to see what the File is all about.

This shows a lot of information such as:
ELF 64-bit: Binary format is ELF for 64 bit architecture.LSB: Least significant byte first little endian encoding.pie executable: Position independent executable. Can be loaded at random addresses so Address Space Layout Randomization works at process start. Makes return oriented programming and static address based tricks harder.x86-64: Target CPU architecture is 64 bit Intel AMD compatible.dynamically linked: The program uses shared libraries rather than being fully self contained. Loader will resolve them at runtime.interpreter /lib64/ld-linux-x86-64.so.2: This is the dynamic loader path used to start the program and load its shared libraries.stripped: which means the debug symbols and symbol table entries were removed from the binary so names and debug info are gone.
Its not that bad but is normally makes Reverse Engineering a bit more of a hassle as it takes more time to analyze :).
Reverse Engineering the Binary
After loading the Binary into Ghidra and Analyzing it it becomes pretty clear what is going on.
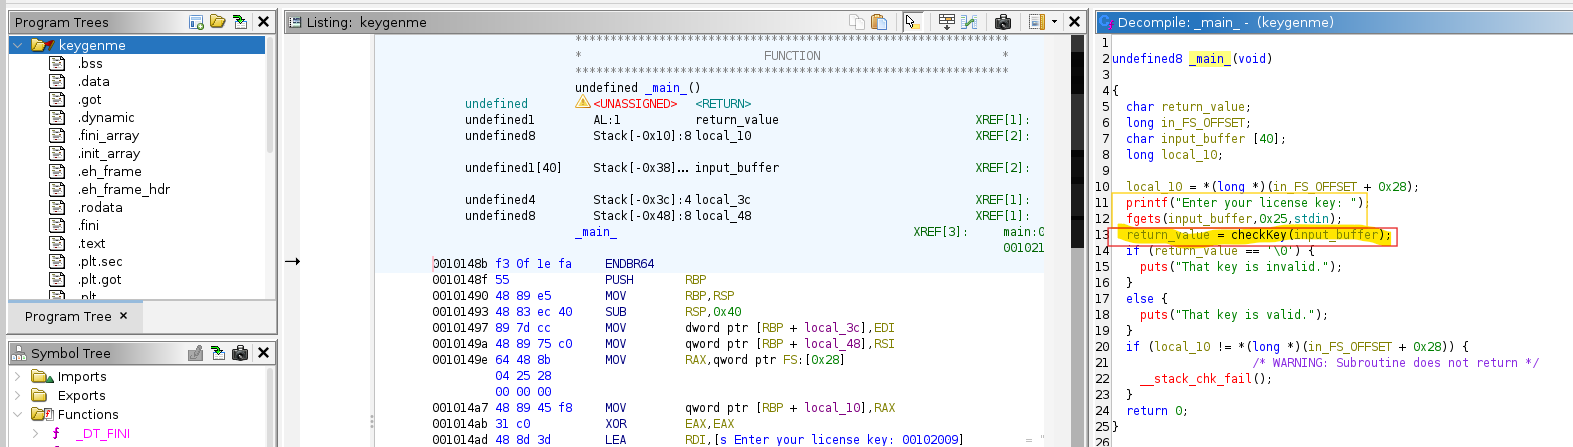
The main function of the binary is pretty simple. It does something along the lines of:
1
2
3
4
5
6
7
8
9
10
11
12
13
printf("Enter your license key: ");
if (fgets(input_buffer, 0x25, stdin) == NULL) {
    puts("Input error.");
    return 1;
}

return_value = (char)checkKey(input_buffer);

if (return_value == '\0') {
    puts("That key is invalid.");
} else {
    puts("That key is valid.");
}
So we can see a few things in here:
fgets(input_buffer, 0x25, stdin)reads up to 36 characters plus null terminator. This already is a BIG hint. Before we saw that the first part of the Flag ispicoCTF{br1ng_y0ur_0wn_k3y_. Thats 27 Characters, so we are missingXXXXXXXX8 characters (plus null terminator) to have the complete flag of 36 characters.return_value = (char)checkKey(input_buffer);is the most important thing. If we know what happens incheckKey(i gave that name to the function), we know how to generate the correct flag.if (return_value == '\0') {just shows us that the return value has to be not0.
The checkKey() Function is way more interesting.
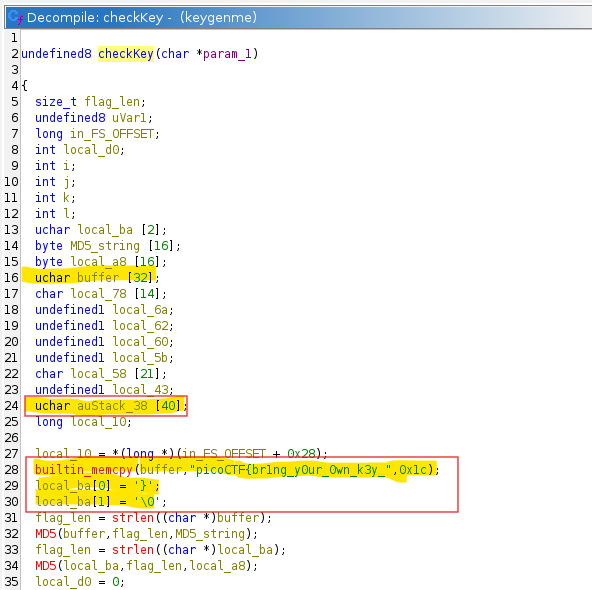
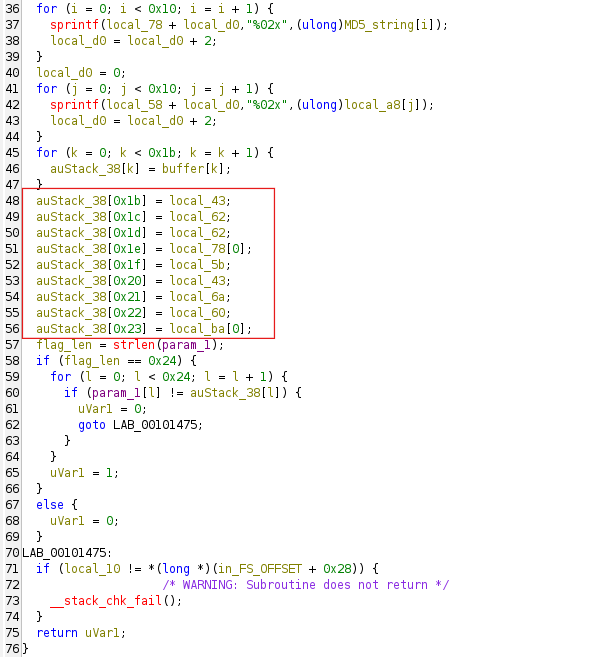
The first part that intersting to me is The code copies 0x1c (28) bytes from a literal into a local buffer (Line 28). The literal is exactly picoCTF{br1ng_y0ur_0wn_k3y_. That literal contains 27 printable characters. Copying 28 bytes includes the trailing zero byte from the data section. strlen on that buffer returns 27. So the canonical prefix length is 27 and its bytes occupy expected positions 0 through 26.
The decompiled code is a bit messy but the net effect is: positions 27..34 are filled with specific single characters taken from the hex encoded MD5 strings. The reason this looks confusing is that the compiler stored these bytes as individual stack locals, and Ghidra could not automatically re-group them into a single array. So names like local_43 and local_62 are just single bytes of the MD5 hex strings, not independent values. The decomp shows that the bytes are placed in order (using the names from the decompile)
1
2
3
4
5
6
7
8
9
[27] = local_43
[28] = local_62
[29] = local_62
[30] = local_78[0]
[31] = local_5b
[32] = local_43
[33] = local_6a
[34] = local_60
[35] = local_ba[0] (which is '}')
So now we know that the function builds fixed prefix then 8 bytes derived from MD5 hex outputs then closing brace. It requires exact length 36 and does a strict byte compare. For us this makes it pretty easy as we can now just go and debug that Program and read what exactly is hidden inside that buffer auStack_38.
Debugging the Binary
To debug this program I will use GDB as I am most familiar with that. Because the binary is PIE, addresses will change between runs unless we disable ASLR in gdb :).
- To start this we first want to make the binary executable
chmod +x ./keygenme. Then we run it with gdbgdb ./keygenme. - First because we need User Input I create a file with the following content
picoCTF{br1ng_y0ur_0wn_k3y_XXXXXXXX. - Then I ran the debugger again and used
layout asmto show me the Assembly Layout. - Afterwards I break at a known libc symbol to get a stable starting point for control flow. I used
break *printfto stop on the program call toprintf(). Stopping at a libc function is useful because those symbols exist in dynamic libraries even when the binary is stripped. - Then I ran the program with Input:
run < key
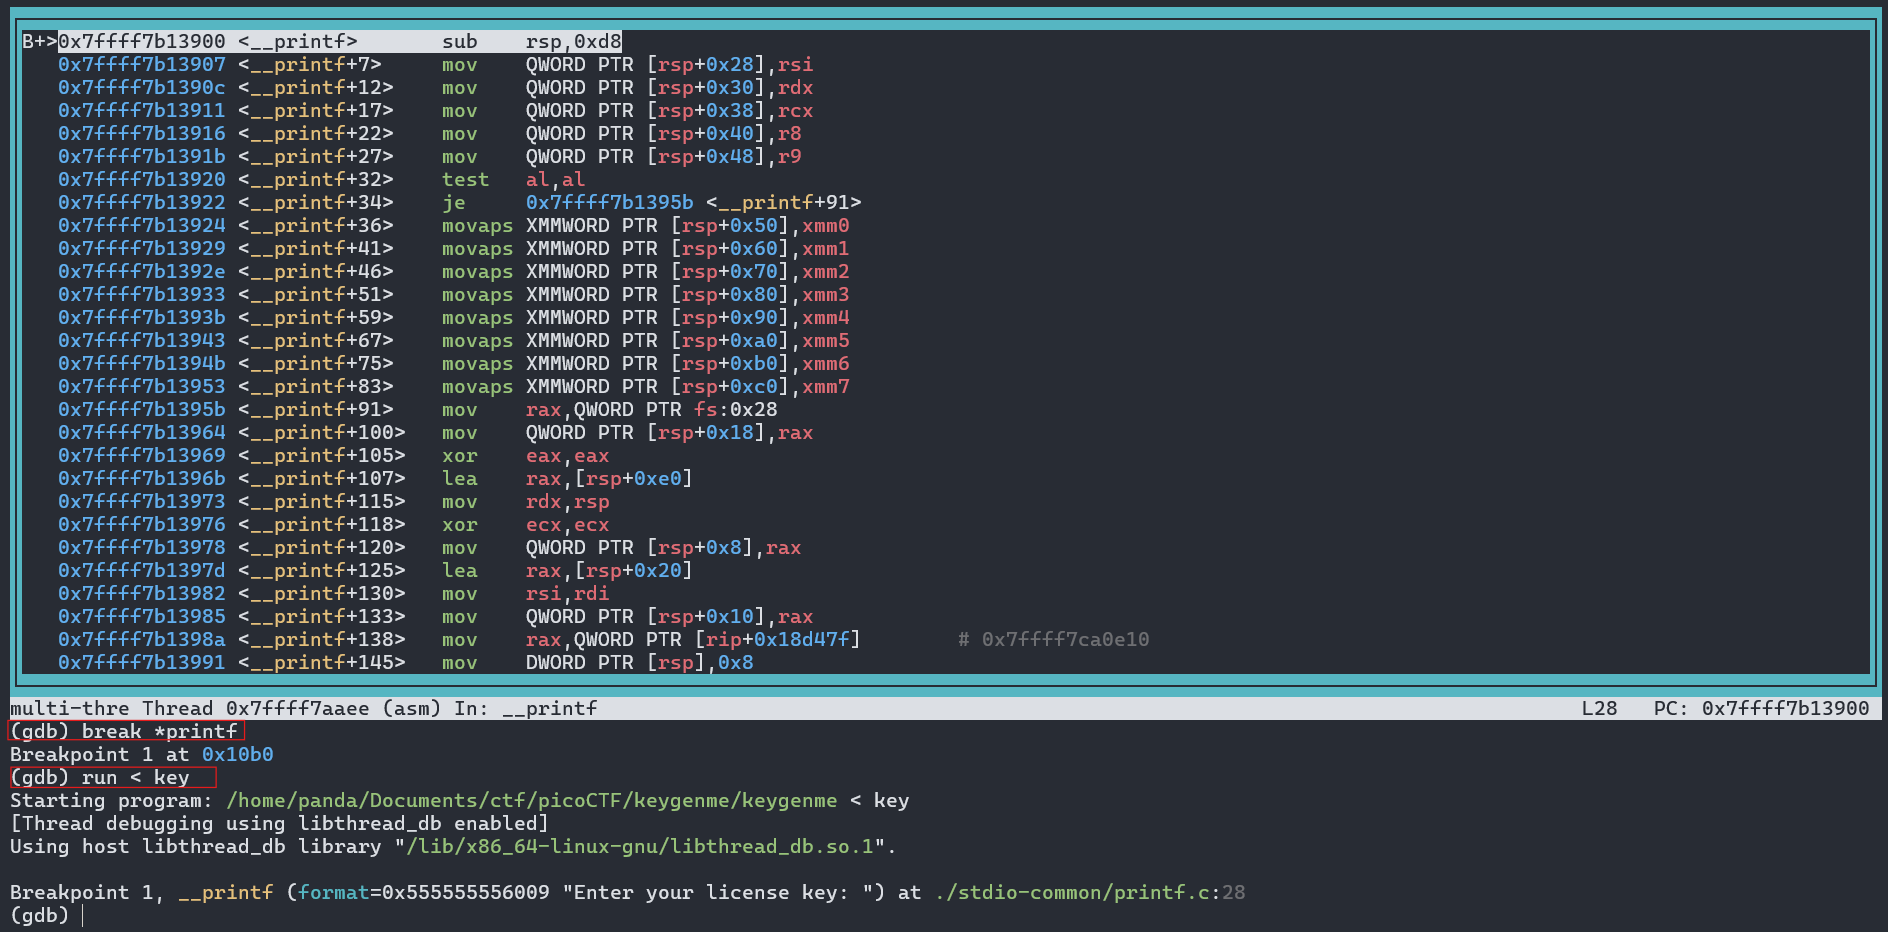
- Here we can see that we are currently “breaking” on the first call of our printf() Function.
- Use
finishto step out of the library call and return to the caller. That reveals the call site inmain()and shows the instruction that calls the check routine. - Here we see something SUPER familiar. At the address 0x5555555554dd we can see a call to our
checkKey()Function.
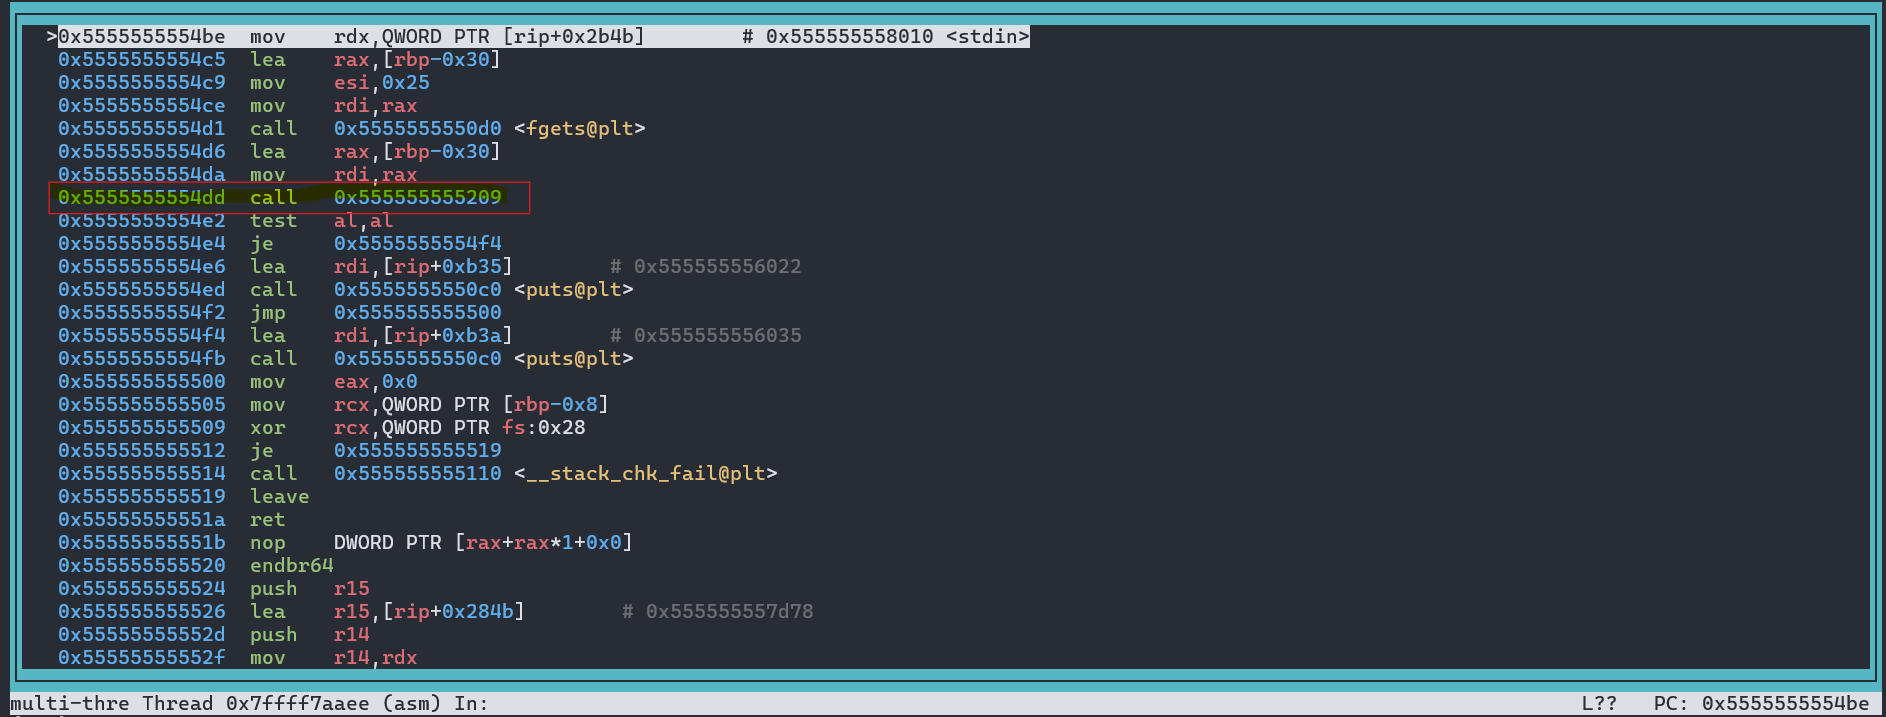
Lets compare again:
1
2
3
4
5
6
7
8
9
10
11
12
13
printf("Enter your license key: ");
if (fgets(input_buffer, 0x25, stdin) == NULL) {
    puts("Input error.");
    return 1;
}

return_value = (char)checkKey(input_buffer);

if (return_value == '\0') {
    puts("That key is invalid.");
} else {
    puts("That key is valid.");
}
We can now clearly see the call to fgets() and the next call would be our checkKey().
- Now we set a breakpoint at the address 0x5555555554dd with
break *0x5555555554ddand thencontinue. Once we land there we can “Step Into” withsi. - We step into checkKey and are now inside our
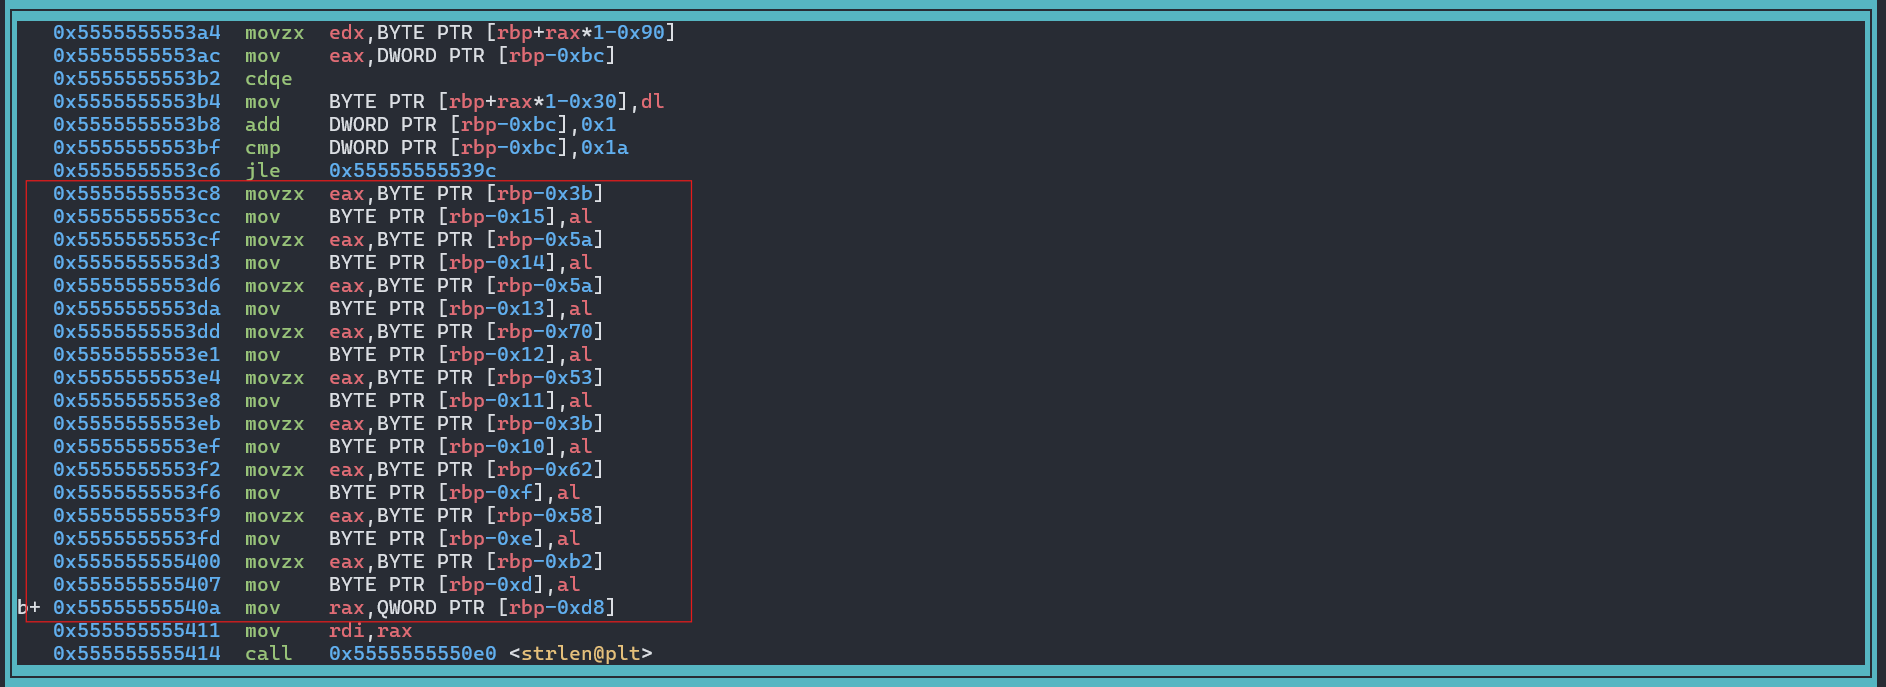
checkKey()Function. Here we just scroll down a bit to find the place that looks like the Code mentioned above. Where the Buffer is being filled. We can check how that looks like in Ghidra as well.
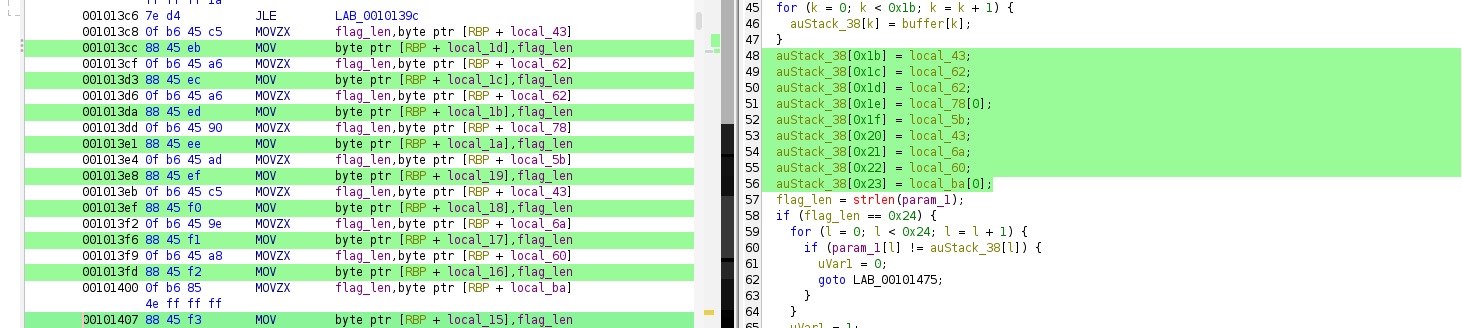
- In gdb this would be the following piece of ASM. Where we also set a Breakpoint again. Preferably somewhere at the end of it. I set mine at
0x55555555540a.
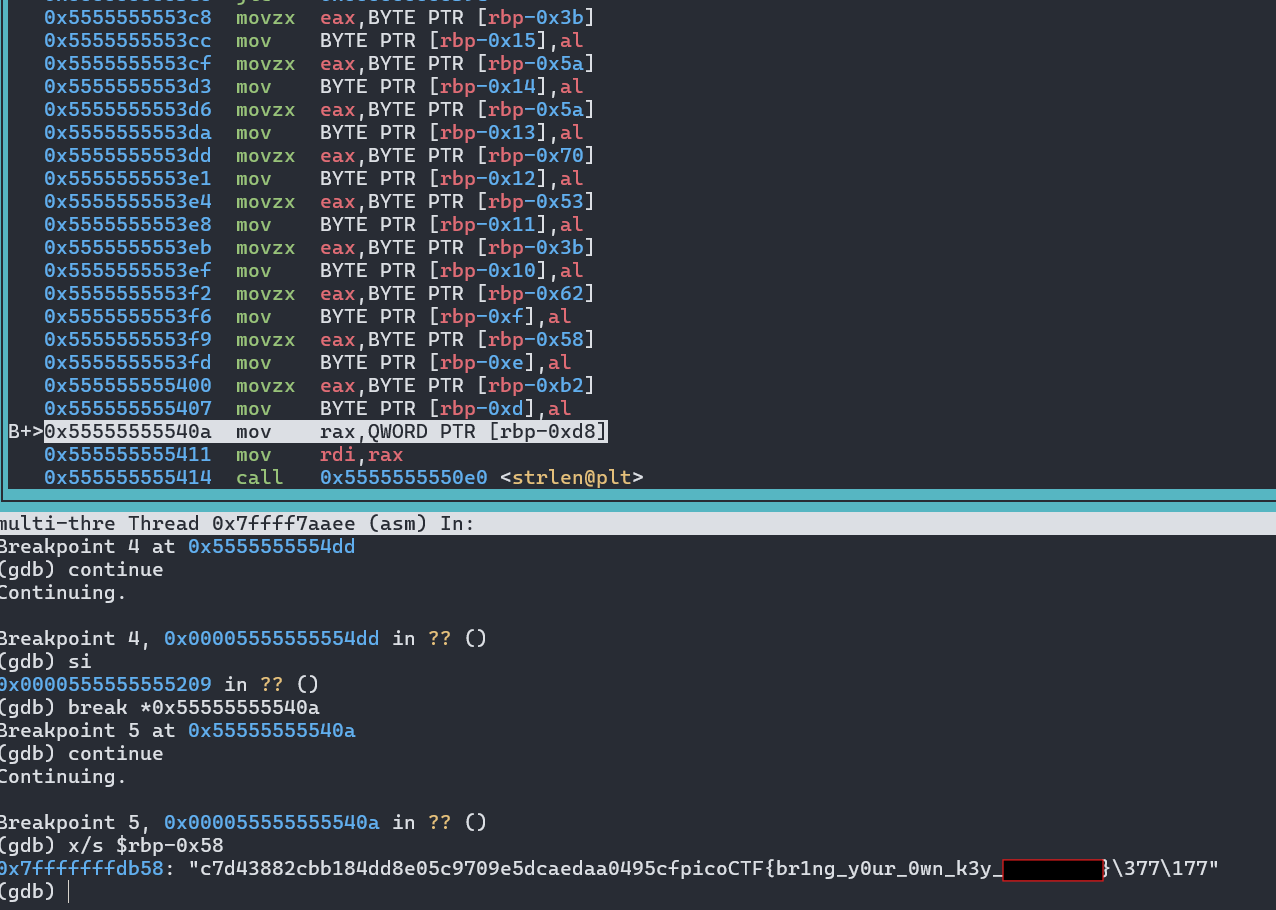
- We then
continueand can now easily just read out the data stored at [rbp-0x58] viax/s $rbp-0x58 - AND BOOM we got our Flag :)
Conclusion and security takeaway
This challenge is a textbook example showing why client side license checks are weak. All data and code needed to validate the key are in the binary. Stripping only removes symbol names it does not hide logic or constants. With basic static and dynamic analysis an attacker can reconstruct the algorithm and compute a valid key. For any real licensing system move validation to a trusted server or use hardware backed attestation. Also avoid obsolete primitives for key derivation MD5 is broken and should not be used for new designs.